Auto Backup Server Database
Tutorial explaining how to make for your database.
1 - Let's see if the nano is installed on your Linux machine, run on the terminal:
sudo apt install nano2 - Let's go the way where you want to save the script .sh can be anywhere of your choice, I will use the root directory of my server as an Example:
cd /home/$USER/canary3 - Now let's create the script.sh:
nano backup-database.sh#!/bin/bash
path="/home/ubuntu/database-backup" #Path where the backup of your database "Db
nameBackup="prod-oracle" #Environment where is hosted
mysqlUser="XX" #Your MySQL user
mysqlPass="XX" #Your MySQL password
mysqlDatabase="XX" #The name of your database "Db
TIMER="$(date +'%d-%m-%Y-%H-%M')"
if [[ -z "$mysqlUser" || -z "$mysqlPass" || -z "$mysqlDatabase" ]]; then
echo "Please fill in username, password and database in settings."
else
# mysqldump -u$mysqlUser -p$mysqlPass $mysqlDatabase > $path"/"$nameBackup"-"$TIMER".sql" &&
mysqldump -u$mysqlUser -p$mysqlPass $mysqlDatabase > $path"/"$nameBackup".sql" &&
cd $path &&
git add . &&
git commit -m "Bkp uploaded automatically '$nameBackup'" &&
git push &&
echo "Backup Complete."
fi4 - Let's give permission to the script created:
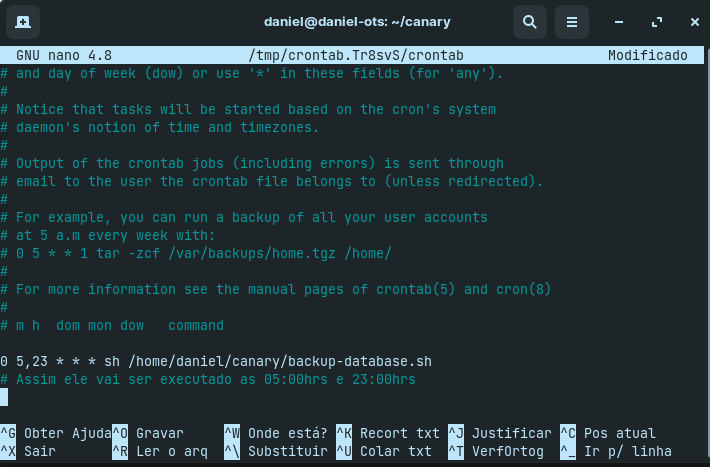
5 - Now we put to run automatically as your choice, run on the Linux terminal the command:
6 - Enter at the end of all some of the options:
7 - Now just restart your Linux machine.
Last updated
