This tutorial is for those who plan to add and register new monsters in the assets of the 12.xx protocol client.
The system was based and created to work with the OTBR version 12.61 base, and may or may not vary with future releases.
If you have another repository this system will not work and no one here will support you to adapt to your base if you want to use this tool
you will need to use the OTBR base, keeping an eye out for future updates for improvements and fixes when needed.
This will affect systems that use monsters with their images and name for their specific features such as bestiary, prey system, boosted creature, task hunting and others.
NOTE: It does not affect anything in relation to sprites, for this you can use other tools such as the assets-editor.
After reading the introduction, we'll start by adding the script to the OTBR server.
The system is made to work within the game through a 'talkaction', but this is only the beginning of the process, the rest we will have to do manually outside the client.
First we insert the talkaction on the server:
Go to /data/scripts/talkactions/god create a file .lua the name you want and paste the following code:
local hex_monster = {
	author = "Marcosvf132",
	date = "19/02/2021",
	version = "1.0",
	organization = "###### OTServ-Br #####",
	objective = " [OTServ-Br 12.x project] \
		Export hex code to create and insert custom creatures on the client protocol 12.xx \
		This system will create a '.txt' file with all the monsters bytes, to insert it on the client you will need to do it \
		manually using a Hex editor (HxD is a good option). \
		-> With this script the user can insert custom monsters with any outfit on bestiary, prey and boosted creature.\
		-> This script was created to work with OTBR repository, this probably won't work with other repository, so don't ask support for it. \
		-> Created based on the client 12.61 protocol, future protocols may have some problems, if so, seek for updates on the OTBR Forum. \
		-> Important note: This script reads all monsters that have raceId registered on the server, if you wan't to remove, edit or create monsters on the client \
			you need to just remove/edit/add it on their repective '.lua' \
		--> The .txt file will be created on /data/ folder -'hex-monster.txt'-. "
}

local hexmonster = TalkAction("/hexmonster")

local function randomValueToHex(nValue)
	return string.format("%2X ", nValue)
end

local function bigDecimalTohex(value)
	local value = bit.bor(value, 0)
	local jumpEscape = value < 64
	local result = ""
	while (true) do
		local byte = bit.band(value, 0x7f)
		value = bit.rshift(value, 7)
		if ((value == 0) and ((bit.band(byte, 0x40)) == 0)) or ((value == -1) and ((bit.band(byte, 0x40)) ~= 0)) then
			if byte < 10 then
				result = result .. " 0" .. tostring(tonumber(randomValueToHex(tostring(byte)))):gsub("%s+", "") .. " "
			elseif byte < 16 then
				result = result .. " 0" .. randomValueToHex(byte):gsub("%s+", "") .. " "
			else
				result = result .. " " .. randomValueToHex(byte):gsub("%s+", "") .. " "
			end
			result = result:gsub("  ", " ")
			return result
		end
		local borBit = bit.bor(byte, 0x80)
		if borBit < 10 then
			result = result .. " 0" .. tostring(tonumber(randomValueToHex(tostring(borBit)))):gsub("%s+", "") .. " "
		elseif borBit < 16 then
			result = result .. " 0" .. randomValueToHex(borBit):gsub("%s+", "") .. " "
		else
			result = result .. " " .. randomValueToHex(borBit):gsub("%s+", "") .. " "
		end
		jumpEscape = false
	end
end

local function retNumberToHex(look_value)
	local ret = look_value > 64 and tostring(randomValueToHex(look_value)) or randomValueToHex(look_value)
	if look_value < 16 then
		ret = ret:gsub("%s+", "")
		ret = "0" .. ret
	end
	return ret
end

local function stringTextToHexChar(str)
    return (str:gsub('.', function (c)
        return string.format('%02X ', string.byte(c))
    end))
end

local function numberToHex(value)
	local ret = tostring(randomValueToHex(tostring(value))):gsub("%s+", "")
	if value < 10 then
		ret = "0" .. tonumber(ret)
	elseif value < 16 then
		ret = retNumberToHex(value)
	end
	return ret
end

function hexmonster.onSay(player, words, param)
	if not player:getGroup():getAccess() or player:getAccountType() < ACCOUNT_TYPE_GOD then
		return true
	end

	local alreadyImplementedRaceId = {}
	local file = io.open("data/hex-monster.txt", "wb")
	if file then
		for index, monsterName in pairs(Game.getBestiaryList()) do
			local mType = MonsterType(monsterName)
			if mType and not(table.contains(alreadyImplementedRaceId, mType:raceId())) then
				local name = mType:name():lower()
				local outfit = mType:outfit()
				local monsterid_bit = bigDecimalTohex(mType:raceId())
				local nameDigits = numberToHex(string.len(name))
				local lookt_bit = bigDecimalTohex(outfit.lookType)
				local looka_bot = numberToHex(outfit.lookAddons)
				local lookh_bot = outfit.lookHead < 128 and numberToHex(outfit.lookHead) or (numberToHex(outfit.lookHead) .. " 01")
				local lookb_bot = outfit.lookBody < 128 and numberToHex(outfit.lookBody) or (numberToHex(outfit.lookBody) .. " 01")
				local lookl_bot = outfit.lookLegs < 128 and numberToHex(outfit.lookLegs) or (numberToHex(outfit.lookLegs) .. " 01")
				local lookf_bot = outfit.lookFeet < 128 and numberToHex(outfit.lookFeet) or (numberToHex(outfit.lookFeet) .. " 01")

				local counter_09 = 0
				if outfit.lookType < 128 then
					lookt_bit = " " .. numberToHex(outfit.lookType) .. " "
				end
				if outfit.lookHead >= 128 then
					lookh_bot = numberToHex(outfit.lookHead - 19)
				end
				if outfit.lookBody >= 128 then
					counter_09 = counter_09 + 1
				end
				if outfit.lookLegs >= 128 then
					counter_09 = counter_09 + 1
					if counter_09 > 1 then
						counter_09 = counter_09 - 1
						lookl_bot = numberToHex(outfit.lookLegs - 19)
					end
				end
				if outfit.lookFeet >= 128 then
					counter_09 = counter_09 + 1
					if counter_09 > 1 then
						counter_09 = counter_09 - 1
						lookf_bot = numberToHex(outfit.lookFeet - 19)
					end
				end
				local byteIncrease = "08"
				if counter_09 > 0 then
					byteIncrease = "09"
				end
				local look_case = ""
				if counter_09 > 0 then
					look_case = "10"
				else
					if outfit.lookType < 128 then
						look_case = "0E"
					else
						look_case = "0F"
					end
				end
				local stringHex, size_bit, return_hex = "", "", ""
				if outfit.lookType == 0 and outfit.lookTypeEx ~= 0 then
					local looke_bit = ItemType(outfit.lookTypeEx) and ItemType(outfit.lookTypeEx):getClientId() or 0
					stringHex = " 08" .. monsterid_bit .. "12 " .. nameDigits .. " " .. stringTextToHexChar(name) .. "1A 03 20" .. bigDecimalTohex(looke_bit)
					size_bit = numberToHex(string.len(stringHex:gsub("%s+", ""))/2)
					return_hex = "0A " .. size_bit .. stringHex .. " "
				elseif outfit.lookTypeEx == 0 then
					stringHex = " 08" .. monsterid_bit .. "12 " .. nameDigits .. " " .. stringTextToHexChar(name) .. "1A ".. look_case .. " 08" .. lookt_bit .. "12"
					stringHex = stringHex .. " " .. byteIncrease .. " 08 " .. lookh_bot ..  " 10 " .. lookb_bot .. " 18 " .. lookl_bot .. " 20 " .. lookf_bot .. " 18 " .. looka_bot
					size_bit = numberToHex(string.len(stringHex:gsub("%s+", ""))/2)
					return_hex = "0A " .. size_bit .. stringHex .. " "
				end
				table.insert(alreadyImplementedRaceId, mType:raceId())
				return_hex = return_hex:gsub("  ", " ")
				file:write(return_hex)
			end
		end
		player:sendCancelMessage("Data file has been succesfully created.")
		io.close(file)
	end
	return true
end

hexmonster:separator(" ")
hexmonster:register()
Save the file and restart the server, done so we already have the script ready to use.
Adding monsters:
First we will choose the monster id (raceid):
The ID of the monster is unique, that is, can not conflict with another monster, for this reason it is necessary to put values that we know is not used,
So far the id's that are already registered in the official client start in 2 and end in approximately 2200, for this reason it is advisable
to start using values very distant, giving room for future official monsters that will be added to this list.
If you're editing your server completely and want to redo all monsters from the first to the last, then you can make your own sequence
according to the .lua of your monsters, respecting the rule that you can't have more than one monster per ID.
To add a monster is quite simple, it is necessary to only register it in the bestiary, to do this just insert the following information in the .lua of the monster(s), example:
monster.raceId = xxxx -- O id do monstro, checar anotações
monster.Bestiary = { -- Os seguintes dados não sao essenciais para este tutorial, porém é necessario fazer para funcionar corretamente dentro do jogo.
	class = "Demon", -- Nome da raça do monstro, checar anotação para saber as outras opções.
	race = BESTY_RACE_DEMON, -- ID da raça do monstro, checar anotação para saber as outras opções.
	toKill = xxxxx, -- Quantidade de monstros mortos para liberar o monstro e poder usar uma runa de charm.
	FirstUnlock = xx, -- Quantidade de monstros mortos para desbloquear as primeiras informações do monstro na bestiary.
	SecondUnlock = xxx, -- Quantidade de monstros para desbloquear todas informações do monstro na bestiary.
	CharmsPoints = xx, -- Quantidade de pontos que o player ira receber quando alcançar a quantidade total de abates do monstro (toKill)
	Stars = x, -- Numero de estrelas do monstro, basicamente é a dificuldade do monstro (de 1 a 5)
	Occurrence = x, -- Dificuldade para encontrar o monstro dentro do jogo
	Locations = "Temple of hate." -- Descrição do monstro dentro da bestiary.
	}

-- Anotações:
--  "class"				"race"
-- "Amphibic"			- BESTY_RACE_AMPHIBIC
-- "Aquatic"			- BESTY_RACE_AQUATIC
-- "Bird"			- BESTY_RACE_BIRD
-- "Construct"			- BESTY_RACE_CONSTRUCT
-- "Demon"			- BESTY_RACE_DEMON
-- "Dragon"			- BESTY_RACE_DRAGON
-- "Elemental"			- BESTY_RACE_ELEMENTAL
-- "Extra Dimensional"		- BESTY_RACE_EXTRA_DIMENSIONAL
-- "Fey" 			- BESTY_RACE_FEY
-- "Giant"			- BESTY_RACE_GIANT
-- "Humanoid" 			- BESTY_RACE_HUMANOID
-- "Human" 			- BESTY_RACE_HUMAN
-- "Lycanthrope" 		- BESTY_RACE_LYCANTHROPE
-- "Magical" 			- BESTY_RACE_MAGICAL
-- "Mammal" 			- BESTY_RACE_MAMMAL
-- "Plant" 			- BESTY_RACE_PLANT
-- "Reptile" 			- BESTY_RACE_REPTILE
-- "Slime" 			- BESTY_RACE_SLIME
-- "Undead" 			- BESTY_RACE_UNDEAD
-- "Vermin" 			- BESTY_RACE_VERMIN
Done with all the monsters you want to insert into the client, restart the server so that it is registered to the server and, once restarted, proceed to the next step.
Editing a monster:
Any changes that are in .lua of the monsters will be automatically pulled into the system, which will then take those changes to the client with the following steps.
Running the system:
The script is meant to function as a 'talkaction' to be used by a character who has GOD' access. Once with the script installed
inside the folder /data/scripts/talkactions/god/ and the changes of the monsters already made, we will restart the server and, after restarted, is to run the talkaction by typing /hexmonster
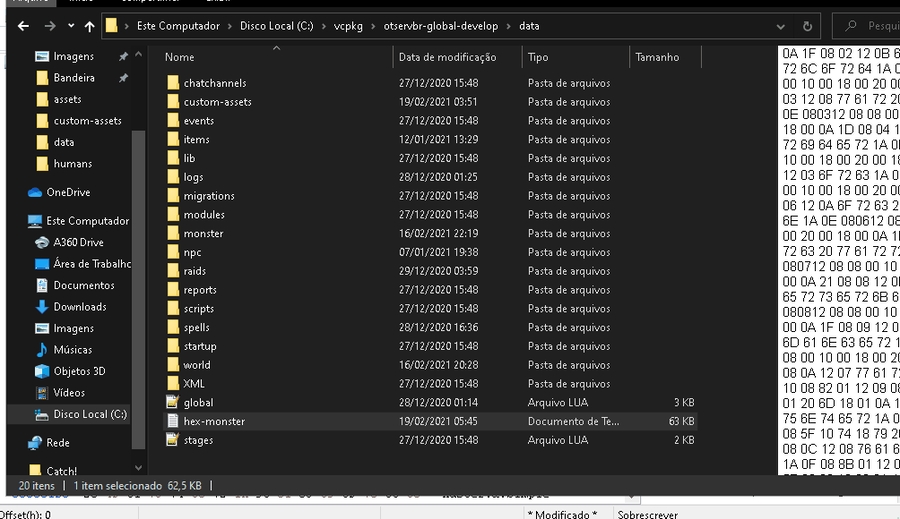
Once this is done, the following message should appear on your screen:
Appearing in this message the hex-monster file.txt be created in the /data/ folder:
Inserting the data into the client:
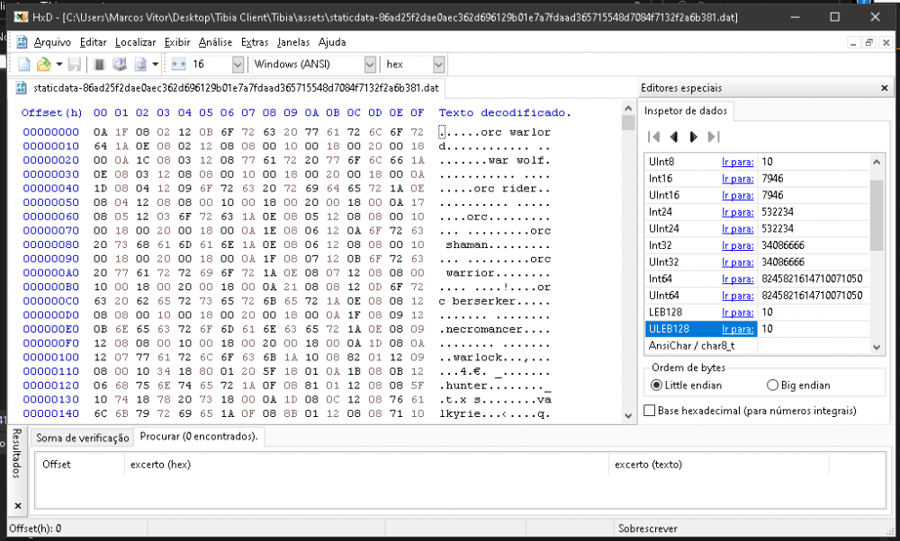
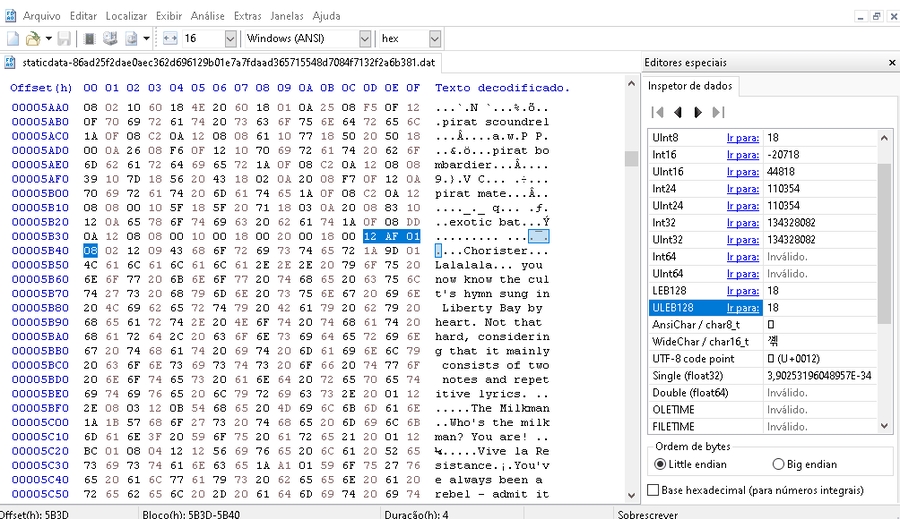
Once the hex-monster file is created.txt we will insert the data into the client assets with a Hex editor program. In this tutorial I will use the HxD editor:
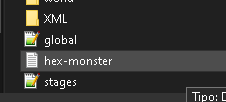
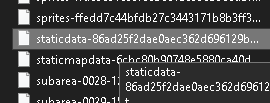
We'll identify the file where the monster data is located. Go to your client's folder and look for the assets folder, mine for example is in C:\Users\Marcos Vitor\Desktop\Tibia Client\Tibia\assets.
Within this folder look for the file whose name is staticdata-NUMEROGIANT.dat. There is only one with the name staticdata so there is no mistake.
Open this file with the HxD editor and you'll see this screen when you open:
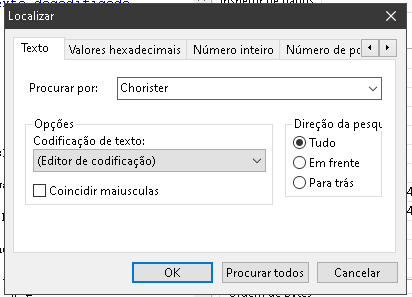
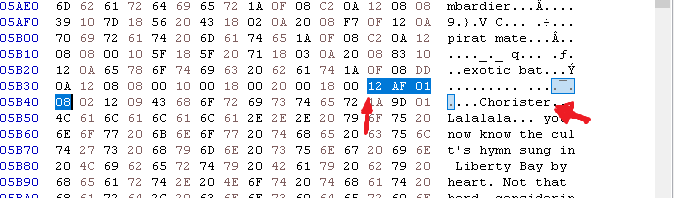
Hit the ctrl + f shortcut and look for Chorister:
After finding, in the bytes window look for the following sequence 12 AF 01 08:
When you find this sequence, select and delete the entire sequence ending in 12 AF 01 08 and go to the beginning, i.e. from the back 12:
After deleting all previous data we will add the new values. Go to the hex-monster file.txt copy everything inside it. Done that paste everything
inside the HxD in the first line before the 12 AF 01 08 and save.
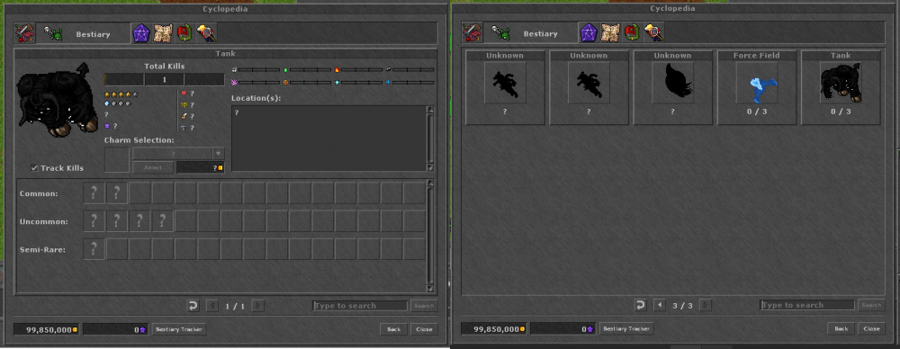
Done that we already have everything ready and configured. Open the client again and all changes will already be made. Open your bestiary to prove:
As seen in the example of the last two photos, any outfit can be added to the client, including outfits that are of items (lookTypeEx)."
Adding to the boosted creature:
Once added in the bestiary the monster is already automatically inserted into the 'boosted creature' system.
Adding to prey-system:
The prey system is not done in an automated way, in which case we must add the monster ID (raceid) manually in the list of that system.
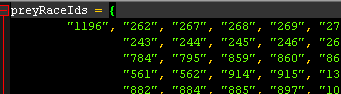
First we will add the monster ID (raceid) in the file \data\modules\scripts\prey_system\assets.lua
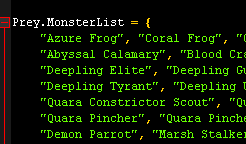
The second and final step is to add the monster name to the \data\modules\scripts\prey_system\prey file.lua