[Windows][WSL] Canary + Uniform Server + MyAAC

1 - Install WSL:

2 - Install a Linux Distribution:

3 - Installation - Canary:

Debian
sudo apt update 
sudo apt dist-upgrade
sudo apt install git cmake build-essential autoconf libtool ca-certificates curl zip unzip tar pkg-config ninja-build ccache linux-headers-generic

-

sudo apt install acl
cd ~

git clone https://github.com/microsoft/vcpkg
cd vcpkg
./bootstrap-vcpkg.sh
cd ~

git clone --depth 1 https://github.com/opentibiabr/canary.git
sudo setfacl -R -m g:www-data:rx /home/$USER/
sudo setfacl -R -m g:www-data:rx /home/$USER/canary
sudo chmod -R 755 canary
cd canary
mv config.lua.dist config.lua
mkdir build && cd build

cmake -DCMAKE_TOOLCHAIN_FILE=~/vcpkg/scripts/buildsystems/vcpkg.cmake .. --preset linux-release
cmake --build linux-release -j4

cd ~
cd canary
cp -r build/linux-release/bin/canary .
sudo chmod +x canary
Ubuntu 20.04
sudo apt update 
sudo apt dist-upgrade
sudo apt install git cmake build-essential autoconf libtool ca-certificates curl zip unzip tar pkg-config ninja-build ccache linux-headers-generic

Update cmake:

1 - Uninstall the default version provided by Ubuntu's package manager and configuration:
sudo apt purge --auto-remove cmake
hash -r

2 - Prepare for installation:
sudo apt update && sudo apt install -y software-properties-common lsb-release && sudo apt clean all

3 - Obtain a copy of kitware's signing key:
wget -O - https://apt.kitware.com/keys/kitware-archive-latest.asc 2>/dev/null | gpg --dearmor - | sudo tee /etc/apt/trusted.gpg.d/kitware.gpg >/dev/null

4 - Add kitware's repository to your sources list:
sudo apt-add-repository "deb https://apt.kitware.com/ubuntu/ $(lsb_release -cs) main"

5 - Install the kitware-archive-keyring package:
sudo apt update && sudo apt install kitware-archive-keyring && sudo rm /etc/apt/trusted.gpg.d/kitware.gpg

6 - Verify key signature:
sudo apt update
Note: If running sudo apt update gets the following error:
The following signatures couldn't be verified because the public key is not available: NO_PUBKEY 42D5A192B819C5DA
Copy the public key 42D5A192B819C5DA and run this command:
sudo apt-key adv --keyserver keyserver.ubuntu.com --recv-keys 42D5A192B819C5DA

7 - Install CMake:
sudo apt update
sudo apt install cmake
cmake --version

Update gcc:

sudo add-apt-repository ppa:ubuntu-toolchain-r/test -y
sudo apt update
sudo apt install gcc-11 g++-11
sudo update-alternatives --install /usr/bin/gcc gcc /usr/bin/gcc-11 100 --slave /usr/bin/g++ g++ /usr/bin/g++-11 --slave /usr/bin/gcov gcov /usr/bin/gcov-11 --slave /usr/bin/aarch64-linux-gnu-gcc aarch64-linux-gnu-gcc /usr/bin/aarch64-linux-gnu-gcc-11  --slave /usr/bin/aarch64-linux-gnu-g++ aarch64-linux-gnu-g++ /usr/bin/aarch64-linux-gnu-g++-11
sudo update-alternatives --set gcc /usr/bin/gcc-11
gcc-11 --version
g++-11 --version

-

sudo apt install acl
cd ~

git clone https://github.com/microsoft/vcpkg
cd vcpkg
./bootstrap-vcpkg.sh
cd ~

git clone --depth 1 https://github.com/opentibiabr/canary.git
sudo setfacl -R -m g:www-data:rx /home/$USER/
sudo setfacl -R -m g:www-data:rx /home/$USER/canary
sudo chmod -R 755 canary
cd canary
mv config.lua.dist config.lua
mkdir build && cd build

cmake -DCMAKE_TOOLCHAIN_FILE=~/vcpkg/scripts/buildsystems/vcpkg.cmake .. --preset linux-release
cmake --build linux-release -j4

cd ~
cd canary
cp -r build/linux-release/bin/canary .
sudo chmod +x canary
Ubuntu 22.04
sudo apt update 
sudo apt dist-upgrade
sudo apt install git cmake build-essential autoconf libtool ca-certificates curl zip unzip tar pkg-config ninja-build ccache linux-headers-generic

Update cmake:

1 - Uninstall the default version provided by Ubuntu's package manager and configuration:
sudo apt purge --auto-remove cmake
hash -r

2 - Prepare for installation:
sudo apt update && sudo apt install -y software-properties-common lsb-release && sudo apt clean all

3 - Obtain a copy of kitware's signing key:
wget -O - https://apt.kitware.com/keys/kitware-archive-latest.asc 2>/dev/null | gpg --dearmor - | sudo tee /etc/apt/trusted.gpg.d/kitware.gpg >/dev/null

4 - Add kitware's repository to your sources list:
sudo apt-add-repository "deb https://apt.kitware.com/ubuntu/ $(lsb_release -cs) main"

5 - Install the kitware-archive-keyring package:
sudo apt update && sudo apt install kitware-archive-keyring && sudo rm /etc/apt/trusted.gpg.d/kitware.gpg

6 - Verify key signature:
sudo apt update
Note: If running sudo apt update gets the following error:
The following signatures couldn't be verified because the public key is not available: NO_PUBKEY 42D5A192B819C5DA
Copy the public key 42D5A192B819C5DA and run this command:
sudo apt-key adv --keyserver keyserver.ubuntu.com --recv-keys 42D5A192B819C5DA

7 - Install CMake:
sudo apt update
sudo apt install cmake
cmake --version

-

sudo apt install acl
cd ~

git clone https://github.com/microsoft/vcpkg
cd vcpkg
./bootstrap-vcpkg.sh
cd ~

git clone --depth 1 https://github.com/opentibiabr/canary.git
sudo setfacl -R -m g:www-data:rx /home/$USER/
sudo setfacl -R -m g:www-data:rx /home/$USER/canary
sudo chmod -R 755 canary
cd canary
mv config.lua.dist config.lua
mkdir build && cd build

cmake -DCMAKE_TOOLCHAIN_FILE=~/vcpkg/scripts/buildsystems/vcpkg.cmake .. --preset linux-release
cmake --build linux-release -j4

cd ~
cd canary
cp -r build/linux-release/bin/canary .
sudo chmod +x canary

Observations:

-- Running vcpkg install

This step will take a long time on the first run, as it needs to download and install all the dependencies, so be patient!

• How to update vcpkg:

If you already have vcpkg installed

To update vcpkg installation, run the commands below:

  • git pull

  • .\vcpkg upgrade

  • .\vcpkg upgrade --no-dry-run

  • .\bootstrap-vcpkg.sh

4 - Download Uniform Server:

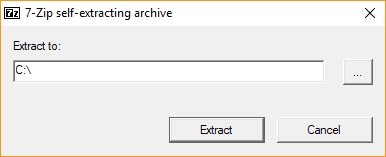
5 - Installation of Uniform Server:

  • Install Uniform Server (15_0_1_ZeroXV) on the C:\ drive.

  • Example:

  • On unit C:\ after installation, the folder name is UniServerZ.

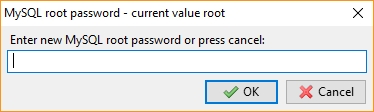
  • When you open Uniform Server, a window will open asking for the MySQL root password:

  • The default password in this case is root.

  • Uniform Server is ready for use.

  • Enable PHP Extensions:

  • PHP -> Edit Basic and Modules -> PHP Modules Enable/Disable and enable:

  • bz2, curl, mbstring, zip;

  • To start Uniform Server:

  • Click the Start Apache button;

  • Click the Start MySQL button.

6 - Database:

  • In Uniform Server, click the phpMyAdmin button and will open in the browser the web application to manage database.

  • Go to Users, edit root user and add the IPv4 address of your computer.

  • On the left side click +New and create a database (e.g. canary)

  • Import the schema file.sql which is in the Canary folder.

7 - Config.lua:

• For data-canary:

-- Core settings
-- Note: If you want to use datapack folder canary (custom), put only "data-canary"
-- If you want to use the global datapack folder, put "data-otservbr-global"
-- If "useAnyDatapackFolder" is set to true then you can choose any datapack folder for your server
useAnyDatapackFolder = false
dataPackDirectory = "data-canary"
-- Don't change this unless you know what you're doing
coreDirectory = "data"

-- Map
-- NOTE: set mapName WITHOUT .otbm at the end
-- NOTE: If toggleDownloadMap if false, then the mapDownloadUrl will not be used
-- NOTE: If a map with the name already exists in the world folder, the map will not be downloaded even if the toggleDownloadMap is true
toggleDownloadMap = false
mapName = "canary"
mapDownloadUrl = "https://github.com/opentibiabr/canary/releases/download/v3.0.0/otservbr.otbm"
mapAuthor = "OpenTibiaBR"

-- Custom Map
-- NOTE: toggleMapCustom set to true will load all maps in custom map folder
toggleMapCustom = false

-- Connection Config
ip = "127.0.0.1"
serverName = "Canary"

-- MySQL
mysqlHost = "IPv4"
mysqlUser = "root"                      
mysqlPass = "root"                       
mysqlDatabase = "canary"        
mysqlPort = 3306
mysqlSock = ""
passwordType = "sha1"

For data-otservbr-global:

-- Core settings
-- Note: If you want to use datapack folder canary (custom), put only "data-canary"
-- If you want to use the global datapack folder, put "data-otservbr-global"
-- If "useAnyDatapackFolder" is set to true then you can choose any datapack folder for your server
useAnyDatapackFolder = false
dataPackDirectory = "data-otservbr-global"
-- Don't change this unless you know what you're doing
coreDirectory = "data"

-- Map
-- NOTE: set mapName WITHOUT .otbm at the end
-- NOTE: If toggleDownloadMap if false, then the mapDownloadUrl will not be used
-- NOTE: If a map with the name already exists in the world folder, the map will not be downloaded even if the toggleDownloadMap is true
toggleDownloadMap = true
mapName = "otservbr"
mapDownloadUrl = "https://github.com/opentibiabr/canary/releases/download/v3.0.0/otservbr.otbm"
mapAuthor = "OpenTibiaBR"

-- Custom Map
-- NOTE: toggleMapCustom set to true will load all maps in custom map folder
toggleMapCustom = true

-- Connection Config
ip = "127.0.0.1"
serverName = "OTServBR-Global"

-- MySQL
mysqlHost = "IPv4"
mysqlUser = "root"                      
mysqlPass = "root"                       
mysqlDatabase = "otservbr-global"        
mysqlPort = 3306
mysqlSock = ""
passwordType = "sha1"

8 - MyAAC:

8.1 - Download MyAAC:

8.2 - Installation MyAAC:

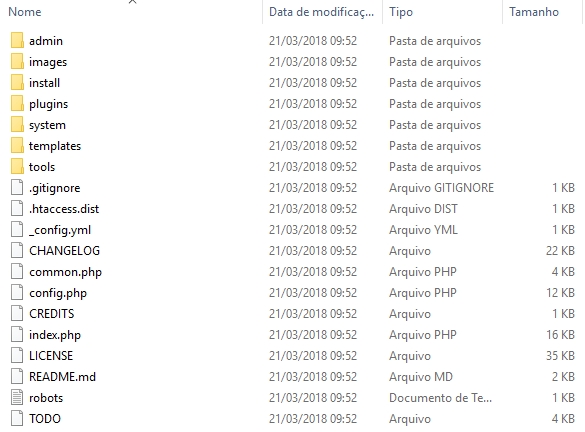
  • Open Uniform Server www folder and delete all files before saving the files and folders from MyAAC.

  • Unzip MyAAC files and folders in the Uniform Server www folder.

  • Leave all MyAAC files and folders as shown in the example below:

  • Access http://127.0.0.1 to load MyAAC.

  • Follow the installation steps to install MyAAC.

  • When choosing the version, select 13.16.

9 - Starting and Connecting to the Server:

9.1 - Starting the Server:

  • Double click canary.exe, it will start the server.

9.2 - Connecting to the Server:

  • To connect to the server according to the indicated version, you need the client below:

  • Note: to connect on localhost, use the client 127.0.0.1_client.exe or edit the client with the ip http://127.0.0.1/login.php.

• How to edit the client:

  • To connect with the client, you need the login.php for MyAAC:

10 - Credits:

Last updated